Creating a Personal Timeline – Gaining Perspective on the Past to Help Guide You Today
 When I first created my personal timeline, I experienced affirmation, healing, and a greater sense of God’s movement in my life. At times, I felt sad over missed opportunities or painful situations. Yet, I also rejoiced, as I saw God mixing the defining moments and seasons into something good.
In the Old Testament, the Israelites would often erect stones of remembrance as a reminder of God’s provision and faithfulness. In a similar way, your personal timeline is a way of identifying markers in your life that point to significant events that God used (or can use) to shape you. I am so thankful that God can bring good out of even the most painful event in our lives. This does not mean that we minimize what happened, but we recognize that God is able to redeem even our most painful experiences.
Here are four steps for creating your personal timeline:
1. Identify the Pleasant and Painful Moments/Seasons in Your Life
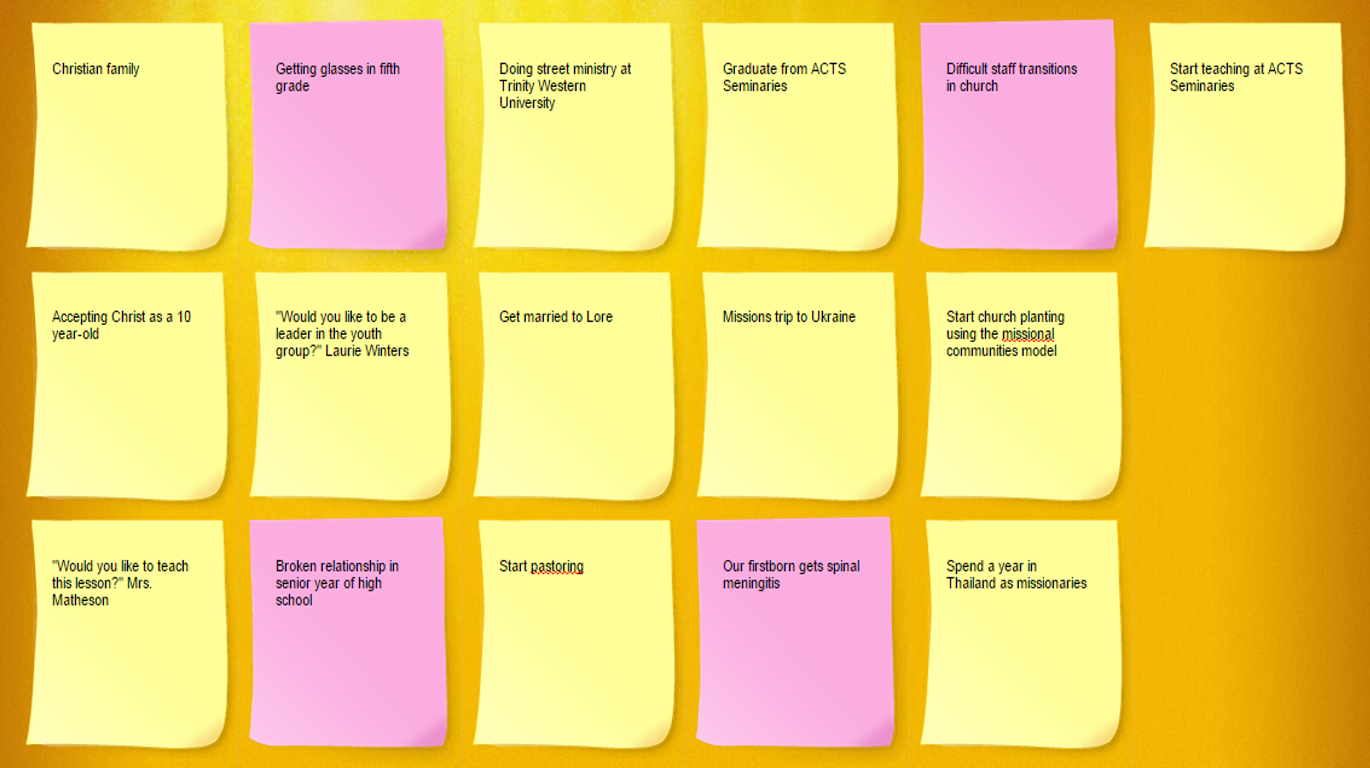
Using one colour of post-it notes for pleasant experiences and another colour for painful events (or colour-coding entries in a spreadsheet/table or using Chazown’s personal timeline tool), brainstorm some of your defining moments or seasons of life. Some of my defining moments are times when people spoke into my life by simply asking a question or making a statement (e.g. "Randy, would you like to teach this lesson to the rest of the class?" and "I would like you to be a leader in this group."). Others occurred over a longer period (e.g. growing up in a Christian family). Put one defining moment/season on each post-it note. At this point, don’t worry about putting them in chronological order. Come up with approximately 20-30 events to start.

2. Arrange Your Experiences in Chronological Order and Give Your Timeline Chapter Titles
Arrange your post-it notes chronologically in columns in a legal-sized folder or on a 14x17 piece of poster board. On different coloured post-it notes, come up with three to five chapter titles for the different seasons of your life. For example, as a young adult I went through several liberating experiences. I have called that chapter in my life, “My Renaissance.”
3. Identify Lessons
As you look at your pleasant and painful defining moments/seasons, what are some of the lessons you learned or perhaps need to learn in a deeper way today? Write these lessons on a different coloured post-it note and put these along the bottom of your timeline. Some of the lessons I identified when I did my timeline the first time were “I can be a leader” and “God’s ways are always the best.”
4. Share Your Timeline With Another Person
One of the most important steps in creating a personal timeline is sharing it (or the parts you feel comfortable sharing) with someone you trust. The other person will likely learn something new about you, which can deepen your relationship. However, it also gives you a chance to verbalize your timeline, which may help you experience more of the affirmation, healing, and understanding about God’s leading that can come out of this kind of reflective exercise.
I would love to hear what you discovered as you went through the personal timeline exercise. Feel free to leave a comment below.
Randy Wollf is the Director of MinistryLift and Associate Professor of Practical Theology and Leadership Studies at MB Seminary.
